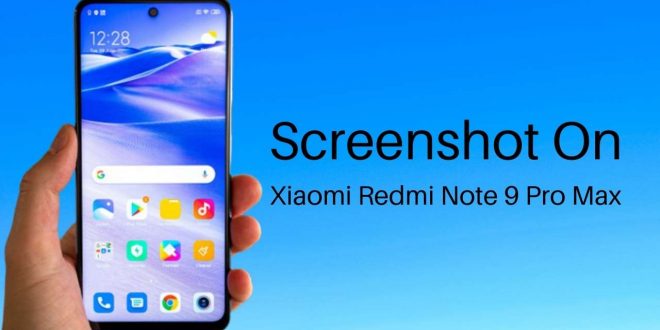
Are you searching how to take a screenshot On Xiaomi Redmi Note 9 Pro Max And Xiaomi Redmi Note 9 Pro? Then you come to the correct webpage.
Modern smartphones and tablets can take screenshots, which simply capture the image that appears on your Xiaomi redmi note 9 pro max or Xiaomi redmi note 9 pro at a certain point in time.
Redmi Note 9 Pro Max and Redmi Note 9 Pro, recently released, come pre-installed with MIUI 11.
The user may not be able to perform simple functions like taking screenshots with a new phone and an unfamiliar operating system.
Best 4 Easy Way To Take A Screenshot On Xiaomi Redmi Note 9 Pro Max And Xiaomi Redmi Note 9 Pro
The following 4 methods will show you how to take screenshots and take long screenshots on the Xiaomi Redmi Note 9 Pro Max and Xiaomi Redmi Note 9 Pro.
Method 1: Sliding three fingers across the screen
In both Xiaomi Redmi Note 9 Pro Max and Redmi Note 9 Pro, a three-finger swipe gesture can be used to take a screenshot.
Following are simple steps you can follow:
Step 1:
- The first thing you need to know is how to use this handy screenshot gesture
- In the Settings menu, you must first enable the three-finger swipe gesture
- After clicking “Additional settings,” follow the on-screen instructions.
- When the menu appears, you will be given the option of choosing “Button and gesture shortcuts.”
- Now you can take a screenshot by clicking “Take a screenshot.”
- From the buttons and gestures menu, select “Slide three fingers down”.
Step 2:
Navigate to the page where you would like to take a screenshot.
Step 3:
Swipe three fingers across the screen to capture a screenshot.
Step 4:
A screenshot can be found in your gallery if your phone has one.
Method 2. Taking a screenshot of quick ball shortcuts
By floating a widget above the desktop, Quick Ball users can access shortcuts and applications they frequently use.
One of the basic functions of Quick ball is to take a screenshot.
By following the steps below, you can enable quick ball shortcuts.
Step 1:
- Quick Ball shortcuts: Before you use them, you should:
- First, the feature must be enabled from the Settings menu
- After selecting “Additional settings,” click “OK.”
- Select “Quick ball.”
- To turn on Quick ball, click the “Turn on Quick ball” button.
- The right edge of the screen will show a curved line when the processing is complete.
Step 2:
Tap the Quick ball on the screen after selecting the page you wish to take a screenshot of.
Step 3:
You can take a screenshot by clicking the scissors icon on the Quick ball menu.
Step 4:
There is a screenshot in your gallery if you have a phone with one.
Method 3: Notification bar screenshot
A screenshot icon can also be found in the notification bar. Clicking on this icon enables you to quickly take a screenshot.
Check out the steps below for how to do this:
Step 1:
Make sure you are on the page you wish to take a screenshot of.
Step 2:
You can bring down the notification bar by swiping from the top to the bottom.
Step 3:
Screenshots can be taken by clicking on the screenshot icon.
Step 4:
You can find the screenshot in your phone’s gallery if you have such a device.
Method 4. Press the volume down and power buttons simultaneously to take a screenshot
This is a common method of working on many Android phones. Follow these steps to get started:
Step 1:
A screenshot can be taken of any page on your screen.
Step 2:
If a thumbnail appears, hold down the “Volume Down” and “Power” keys simultaneously for a few seconds.
Step 3:
A screenshot can be found in your gallery if your phone has one.
What steps to take a long screenshot or extra-long screenshot on your Redmi Note 9 Pro Max and Note 9 Pro?
A scrolling screenshot may be needed if you are unable to capture all the content in a single screenshot.
Following these steps will help you achieve this:
Step 1:
Navigate to the appropriate screen page in order to take a screenshot of a scrolling page.
Step 2:
The four methods listed above are all suitable for capturing a basic screenshot.
Step 3:
An image of the screenshot will appear in the upper-right corner.
The thumbnail image will display several menu options, including “Scroll,” “Send,” “Edit,” and “Delete.” Clicking the thumbnail image will display these menu options.
Step 4:
As soon as you click the “Scroll” icon on your smartphone, the screen will automatically scroll down.
Step 5:
You can stop the scrolling screenshot at a particular location or capture the entire page by clicking on the “done” button below the scrolling screenshot.
Step 6:
After the scrolling screenshot is taken, it will be automatically stored in your phone’s gallery.
Where can I find the screenshot of my Xiaomi Redmi Note 9 Pro Max and Xiaomi Redmi Note 9 Pro?
Most smartphones have a gallery where you can find screenshots.
If it can’t be found in the gallery, you can find the screenshot in the Mi File Manager APP.
When you open the Mi File Manager application, you will find the screenshot in DCIM – Screenshots.
About Xiaomi Redmi Note 9 Pro Max:
| Dimensions Xiaomi Redmi Note 9 Pro | 165.8 x 76.7 x 8.8 mm (6.53 x 3.02 x 0.35 in) |
| Xiaomi Redmi Note 9 Pro Weight | 209 g (7.37 oz) |
| OS | Android 10, MIUI 11 |
| Xiaomi Redmi Note 9 Pro Display | 6.67 inches |
| Screen Resolution | A 20:9 aspect ratio (1080 x 2400 pixels) with 395 pixels per inch (PPI). |
| Chipset | Qualcomm SM7125 Snapdragon 720G (8 nm) |
| Main Camera | 64+8+5+2 MP |
| Selfie Camera | 16 MP |
| Redmi Note 9 Ram | 6 or 8 Gb |
| Redmi Note 9 Storage | 128GB+64 GB |
Check Also: Take A Screenshot On Xiaomi Redmi Note 8 Pro
Final Thoughts:
Hope you like your article on the best 4 easy ways to take a screenshot on Xiaomi redmi note 9 pro max and Xiaomi redmi note 9 pro; if you still have some questions or queries regarding the best 4 easy ways to take a screenshot on Xiaomi redmi note 9 pro max and Xiaomi redmi note 9 pro mention those in the comment section.
Did you master taking a screenshot with your Xiaomi Redmi Note 9 Pro Max and Xiaomi Redmi Note 9 Pro? Do you now know how to take a screenshot with your Xiaomi Redmi Note 9 Pro?
Choose a method from those above that appeals to you. Official Reference
 Mobile Arrival Smartphones and gadget reviews, news and more.
