Are you searching for the best way to take a screenshot on any Windows 10 device? Then you come to the correct webpage.
There are numerous methods available in Windows 10 for taking screenshots of what’s on your computer screen.
The easiest way to take a screenshot on any Windows 10 device
Here are the most common methods for taking a screenshot of your Windows 10 screen, whether you want to take the whole thing or a piece of it.
Print Screen
Taking a screenshot via Print Screen (PrtScn) is the simplest way in Windows 10.
Using the PrtScn key on your keyboard, you can capture your entire screen.
Your Clipboard will be saved with the screenshot.
You can save the screenshot in almost any program that allows you to insert images, including Microsoft Word or Paint.
Windows + Print Screen
A screenshot is automatically taken and saved to disk when you press Windows key + PrtScn on Windows 10.
After your screen dims, you’ll be able to take a screenshot of the entire screen, which will be saved to the Pictures >> Screenshots folder.
Alt + Print Screen
The Alt + PrtScn keyboard shortcut will capture only the active window you’re currently working in and copy it to the Clipboard.
Copying it into another program is the only way to save it.
Snip & Sketch tool
With Snap & Sketch, you can easily take screenshots for Windows, customize them, annotate them or share them.
Utilize the Windows key and Shift + S shortcut to start Snip & Sketch.
As your screen dims, a mini menu appears at the top, where you can choose between rectangular, free-form, window, and full-screen captures.
You can take a screenshot by choosing one of these Snip & Skitch options:
| Type | Feature |
| Rectangular | For your screenshot, draw a rectangle. |
| Free-form | Use your cursor to draw free-hand. |
| Window | Select a particular window to capture. |
| Full-screen | Take a screenshot of the entire screen. |
A preview notification will appear in the lower-right corner of your screen after you capture the screenshot, and it will be saved to your Clipboard.
You can edit the screenshot with the drawing tools of the Snip & Sketch app by clicking on the preview notification.
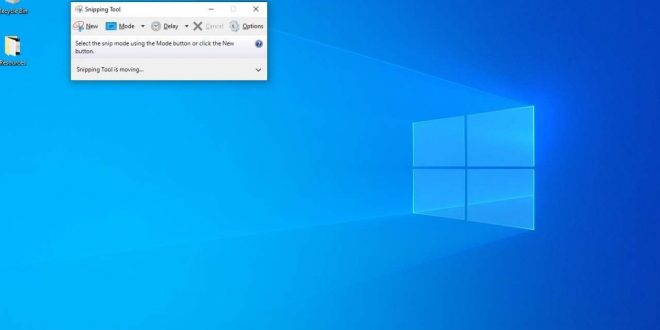
Snipping Tool
Windows 10, 8, 7, and Vista still allow users to use the Snipping Tool to take screenshots even though Snip & Sketch will eventually replace it.
You can find the Snipping Tool and launch it using the search bar.
By clicking the “Mode” button, you can customize your screenshot and then click the “New” button to take a screenshot.
Through the “Delay” dropdown menu, you can also time your photo for up to five seconds.
After taking it in a new window, you can annotate, save, or share your screenshot with Microsoft Outlook.
Game Bar
You can record and take screenshots within any Windows 10 app or game using the Game Bar.
The Game Bar can be opened by pressing the Windows Key + G.
A full-screen screenshot can be taken by clicking the camera icon on the overlay menu.
Additionally, the record button can record a video clip with audio. Click the microphone icon to include audio.
Whenever the Game Bar captures a screenshot or video clip, it is saved in the Videos > Captures folder in PNG format.
Click “Show all captures” in the Game Bar” directly beneath the screenshot button and record button.
Power + Volume Up
Windows 10 requires you to hold down the Power Button and Volume Up Button together to take a screenshot.
The screenshot is saved to a folder in the Pictures > Screenshots category as soon as the screen dims.
Remember:
Press the Windows logo + Volume Down Button on a Surface 3 or earlier to take a screenshot.
Windows screenshot apps from third parties
There are third-party screenshot tools worth considering if you’re dissatisfied with the built-in Windows tools. Each comes with additional options.
- Snapshot tool Snagit lets you create animated GIFs, take screenshots of entire web pages, and more. But what about the downside? It costs $50 for the premium version. You can also try the app for free for 30 days, but all pictures captured during that time will be watermarked.
- With Lightshot, you can quickly share screenshots on social networks. On Windows 10, you can edit text and images more easily with Lightshot, which replaces the Print Screen function.
- The Greenshot editor also allows you to edit and customize screenshots, and you can even capture a complete page as you scroll.
Conclusion:
Hope you like Our article on the best way to take a screenshot on any Windows 10 device; if you still have some questions or queries regarding the best way to take a screenshot on any Windows 10 device, mention those in the comment section.