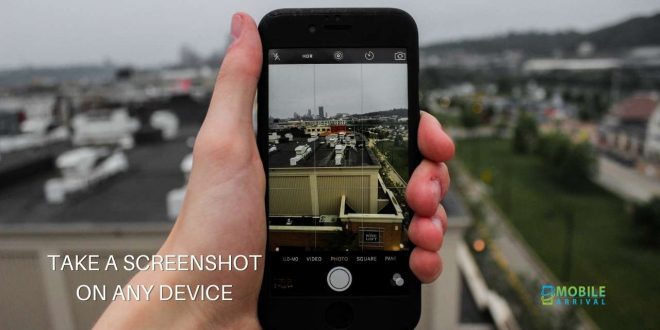
The best way to take a screenshot on any device is something you must know in today’s modern life because we use various devices every day.
Are you interested in saving the screen you’re looking at on your smartphone or computer?
Screen-capture technologies support smartphones and desktops.
Many third-party options and browser extensions can accomplish the task, but most are built into the device.
Contents
- Listed Below Are the Best Ways to Take a Screenshot on Any Device
- The Best method to capture a Screenshot on iPhone or iPad
- How to Take a Screenshot on an Android Device
- What You require to Know About Capturing Screenshots on an Apple Watch
- How to capture a Screenshot on Windows 10
- How to Snap a Picture in Windows 11
- What is the best way to take a screenshot on a Mac?
- What is the best way to take a screenshot on Linux?
- What You Need to Know to Snap a Picture on a Chromebook
- What You Need to Know to Take a Screenshot in a Web Browser
- FAQs:
Listed Below Are the Best Ways to Take a Screenshot on Any Device
These instructions apply to Android, Chrome OS, iOS/iPadOS, Linux, macOS, and Windows.
The Best method to capture a Screenshot on iPhone or iPad
Compatible with iPhone X, 11, 12, and 13 models, and recent versions of iPad Pro and iPad Air
The absence of a Home button on gadgets; On an iPad, you can hold down the top button on the right-hand side of the screen to get started.
Take a screenshot by pressing the power and volume up buttons simultaneously.
Hold down the Sleep/Wake button while pushing the Home button simultaneously to take a screenshot on an Apple device that has a Home button.
A camera shutter will sound, and you will see a “flash” on the screen if your sound is turned on. Your Screenshot will be added to your Screenshots album and saved to your camera roll.
An Apple Pencil and iPad will allow you to take a screenshot using the drawing tool.
You can capture the image by swiping up from the bottom corner of the screen with the Apple Pencil.
It is possible to switch between your current screen and the full website after taking the photo.
When you take an image, you can annotate it by tapping the thumbnail at the bottom of the screen.
In this way, you can alter the Screenshot by using the markup tool on the device.
The traditional method of taking screenshots may be difficult in some apps.
When this happens, you can use the built-in screen recording function on your smartphone.
Even though its primary function is capturing your screen, you can use it to take a screenshot or stop the movie.
Would you please make sure the shortcut button is added to the Control Center first by going to Settings >> Control Center?
A third-party program can also be used to capture the screen on your mobile device.
Sharing your screen via AirPlay and capturing anything on the screen of your mobile device is possible with LonelyScreen.
When Apowersoft’s iPhone/iPad Recorder is connected to the same wireless network as the PC, it will function.
Take your photos in the Control Center by enabling the AirPlay connection.
How to Take a Screenshot on an Android Device
Depending on the phone’s manufacturer, screenshot instructions may differ if an Android device.
Most Android smartphones allow you to capture a screenshot by holding down the power button and the volume down key simultaneously.
In the case of smartphones with physical buttons, you can also hold power and home buttons simultaneously.
In some Android smartphones, the pull-down shade includes a screenshot button.
Take a screenshot with your phone’s voice assistant if you have Google Assistant or Bixby (Samsung).
Press Screen Write on Samsung smartphones to take a screengrab and then use the S Pen to crop or write on the image.
A screenshot gesture is also available on Samsung phones.
Once you’ve located the desired screen image, position your hand like you’re about to karate chop it.
From left to right, swipe your hand across the screen.
Swipe your palm to capture (or disable it) in Settings >> Advanced Features >>Motion and gestures.
All Android users have access to third-party screen capture apps.
Many programs can take screenshots in addition to video recording.
Screenshot Easy is a highly rated alternative using the same fundamental triggers as Android itself.
Changing the settings and taking a screenshot is also possible using the shake of your phone.
Utilize Apowersoft’s Android Recorder to capture screenshots from your PC.
What You require to Know About Capturing Screenshots on an Apple Watch
Taking a screenshot of your Apple Watch screen requires that you first enable the feature.
Start the Watch app on your iPhone, go to Settings > General, turn on Enable Screenshots, or go to Settings > General on your watch and touch Enable Screenshots.
An Apple Watch can be used to capture a screenshot by pulling up the screen you want to capture.
Click the Digital Crown and hold the Side button at the same time.
Like the iPhone, the screen will flash white and then go off when the shutter is pressed.
After that, you will be able to save the Screenshot to your iPhone’s camera roll rather than to the watch itself.
How to capture a Screenshot on Windows 10
Taking a screenshot in Windows 10 is as simple as pressing the Print Screen button.
Some keyboards will be located next to the Space Bar, while others will place it in the upper-right corner.
Once you’ve chosen the screen, hit PrtSc to copy it to the clipboard.
Copy it and paste it into your preferred software by pressing Ctrl + V.
This approach has the disadvantage of recording everything you see on your monitor.
In the case of multiple monitors, it will capture all of them as a single screen.
It’s easiest to capture only the window you’re currently viewing by pressing Alt + Print Screen.
A screenshot toolbar is available in Snap & Sketch for the operating system.
With the Shift + Windows Key + S keyboard shortcut, you can access a toolbar at the top of the screen and choose whether you want to capture the entire screen, just one or two parts, or a specific window.
You can capture a delay if the app is opened immediately.
The older version of Snipping Tool from Microsoft is still available to those who prefer it. It works the same way as Snip & Sketch and can be accessed from the Start menu.
With Windows 10, you can capture your gaming experiences through the Windows Game Bar.
However, it can also take screenshots and record any action.
When the tool opens, hit Windows Key + G and the camera button in the Capture area to take a screenshot. This Screenshot will be saved to your primary user folder’s Videos/Captures folder.
How to Snap a Picture in Windows 11
Anyone wishing to take screenshots in Windows 11 can still use Alt + PrtSc or Print Screen.
Your snapshot will be saved to your Pictures > Screenshots folder in Windows and the Photos app within Windows using the Windows Key + PrtScn shortcut.
In addition to PrtSc, OneDrive can also be used. Click the Settings icon and then click Backup.
All screenshots will be saved to your cloud storage by selecting the Automatically Save Screenshots option.
The Snipping Tool and Snip & Sketch have been unified into a new and better Snipping Tool, so you don’t need to worry about the confusion between screenshot tools.
With Shift + Windows Key + S, you get the same capture options.
Using the shortcut instead of opening the program directly may result in a delay in capturing.
By going to Settings > Accessibility > Keyboard, you can assign the Snipping Tool to the PrtSc key.
Select the Use the Print Screen Button to Open Screen Snipping option to launch the screen capture tool instead of simply capturing the full screen.
It functions the same way it does in Windows 10, despite being referred to as the Xbox Game Bar.
Start the tool with the Windows Key + G, then click the camera icon under the Capture section to save a screenshot.
Using Windows Key + Alt + PrtSc will allow you to capture the Game Bar without opening it first.
Anyone using a current Surface tablet can take a screenshot by pressing Volume Up and Power simultaneously. Older models might have different instructions.
What is the best way to take a screenshot on a Mac?
Mac OS X Mojave users can now take screenshots as they please with new controls.
Among the changes was adding a screenshot tool accessible through Command + Shift + 5 or Launchpad > Other > Screenshot.
Screen capture can be used for various tasks, including saving photographs to your desktop.
If you wish to capture the full screen, a portion of the screen, or just a window, you may do so.
A video can also be recorded on the full screen or a portion of it, and screenshots can be timed or saved in a pre-determined location.
For those who prefer keyboard shortcuts, they are still available.
Command + Shift + 3 will capture the entire screen. You can transform the cursor into a crosshair by pressing Command + Shift + 4 once you want to capture a portion of the screen.
Pick the area you’d like to capture from the screen.
Take a screenshot of a specific window by pressing Command + Shift + 5 (yes, it’s the same shortcut as for taking a screenshot).
To choose between capturing a specific window or an area of the screen, use the space bar.
Press Command + Shift + 6 to capture it if you have a Mac with a Touch Bar.
You can save a picture to the clipboard by adding Control to any keyboard shortcut.
When Command + Shift + Control + 3 is pressed, the entire screen will be captured, but Command + Shift + Control + 4 only capture part of the screen.
You can paste the image into a program, but you cannot save it to a computer.
The size of a snapshot of the full screen taken in PNG format might be quite large if you have a Mac with a Retina display.
It’s possible to choose whether to save the JPG or another format on the Mac.
Launch a terminal on the Mac and type:
write com.apple.screencapture type jpeg as defaults
Input your password if prompted, then restart your computer, and subsequent screenshots should be stored in the format you specified.
With the above Command and PNG at the end, you may always change it back.
Third-party solutions are also available, including Snappy TechSmith Capture, Snagit, Skitch, LightShot, etc.
What is the best way to take a screenshot on Linux?
With Linux, you can take a screenshot almost as easily as you can find varieties of the OS.
The Activity menu in Ubuntu will allow you to select Screenshot.
Taking a screenshot is possible from the entire screen, from a single window, or a customized screen region.
On Linux, you might consider the Print Screen button or the Alt + Print Screen shortcut for capturing a specific window.
By pressing Shift + Print Screen, you can select specific areas to capture.
By adding the Ctrl key to any shortcut, you can save the image to the clipboard.
Once you have captured the image with GIMP (GNU Image Manipulation Program), you can take a screenshot and edit it simultaneously.
Open GIMP and select File >> Acquire >> Screenshot. There are multiple options available to you, including taking up the whole screen, opening a window, or employing a time delay.
You are then presented with the image, which can be edited in GIMP.
What You Need to Know to Snap a Picture on a Chromebook
Chromebooks are equipped with a Show Windows key that can be used to take screenshots.
An image of a box with lines appears next to this button, located at the top of the keyboard.
By pressing Shift + Ctrl + Show Windows, you can select Screenshot and capture the entire screen, a specific window, or part of the screen.
Alternatively, you can click Screen capture and select the time.
A keyboard with an external window switcher button may not be available.
To capture an entire screen, you need to use Ctrl + F5 or Ctrl + Shift + F5 for a portion of the screen.
When your Chromebook is in tablet mode, you can snap a picture of the entire screen by pressing the power and volume down buttons.
You can also upload your screenshots to Google Photos or back them up on Google Drive. Your screenshots will be saved in the Images folder.
Most of the time, you are probably using the Chrome browser on a Chromebook. So you can take advantage of Chrome extensions as well.
What You Need to Know to Take a Screenshot in a Web Browser
Add-ons that enhance browser usability are available for Chrome, Firefox, Safari, and Edge.
These browser add-ons will help you capture screen content seamlessly.
- The Lightshot plugin is available as a Chrome, Edge, or Firefox extension and is free and available for both Windows and Mac.
- You can use FireShot, a premium screen-capturing tool ($59.95, currently $39.95) with either your browser or your email client. Photographs can be captured, edited, uploaded to social media, and saved to your PC. Extensions are available for Google Chrome and Microsoft Edge as well.
- Using Awesome Screenshot, you can take a screenshot of a whole page or part of a page, annotate it (or blur out any dirty bits) immediately, and then share it. Various extensions are available for Chrome, Firefox, and Edge.
- The Nimbus Screen Screenshot program is a freeware program that records portions of the screen or the entire screen.
Besides drawing on the photos, you can also mark them with annotations. Google Chrome, Microsoft Edge, and Mozilla Firefox extensions are available.
- Page Screenshot can take a screenshot of an entire page or a specific portion of a website for a fee of $2.99. The program opens Preview so that the Screenshot can be edited.
Final Word:
Hope you like your article on the best way to take a screenshot on any device; if you still have some questions or queries regarding the best way to take a screenshot on any device, mention those in the comment section.
FAQs:
What is the location of the SS on the HP laptop?
Your keyboard’s Print Screen key, which you usually find in the top right corner, is sometimes abbreviated as PrtScn or PrtSC.
Recording your entire desktop screen is possible with this button.
While the image is being taken, it is not immediately saved; instead, it is copied to your computer’s clipboard.
What is the best way to take a screenshot of my laptop?
Using Windows key+PrtScn, you can directly save a screenshot.
To save the snapshot on your Windows laptop as an image file, use the shortcut command Windows key+PrtScn instead of copying it to the clipboard.
You can take a screenshot by pressing these keys, and it will be saved in the ‘Pictures’ folder.
What is the best way to take a screenshot of my Acer laptop?
Use the following keyboard shortcuts to capture a screenshot of your entire Acer laptop screen: Open the screen you wish to record.
Press both the Windows logo key and the PrtSc key simultaneously.
You are then prompted to take a picture of your current screen, save it to your computer.
What is the procedure for taking a screenshot on an Acer Chromebook 315?
Hold down the Ctrl and Window Switch keys simultaneously to capture your entire Chromebook screen.
Holding down Ctrl, Shift, and Window Switch buttons while dragging the crosshairs icon over the area you want to capture is the easiest way to take a screenshot.
Chromebooks have a Windows key. What does it do?
CTRL + ESC serves as the default “Windows Key.”
 Mobile Arrival Smartphones and gadget reviews, news and more.
